
Get ready for the ultimate handheld cheeseburger experience with these addictively delicious cheeseburger bombs! Savory beef, gooey cheese, and zesty burger toppings are lovingly wrapped in flaky dough for the perfect portable meal.
Imagine perfect cheesy little burgers in mini bite-sized pockets! These Cheeseburger Bombs would be perfect for entertaining. Snacks that make you happy.
Your game day just got upgraded. These little cheeseburger bombs are a fun twist on the classic burger and are one of our favorite easy recipes to make for larger crowds. These tiny little patties wrapped in pop-and-fresh baked-up goodness are made for pint-sized happiness. Think about that as you build your menu plan for the upcoming big game. (Oh, and if you are looking for inspiration – you may want to check out these other seriously delicious appetizers)
What Are Cheeseburger Bombs?
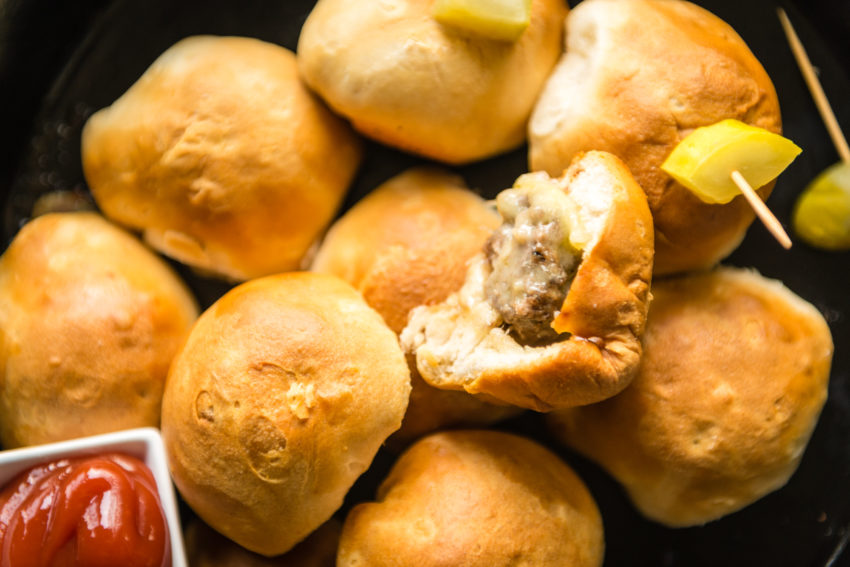
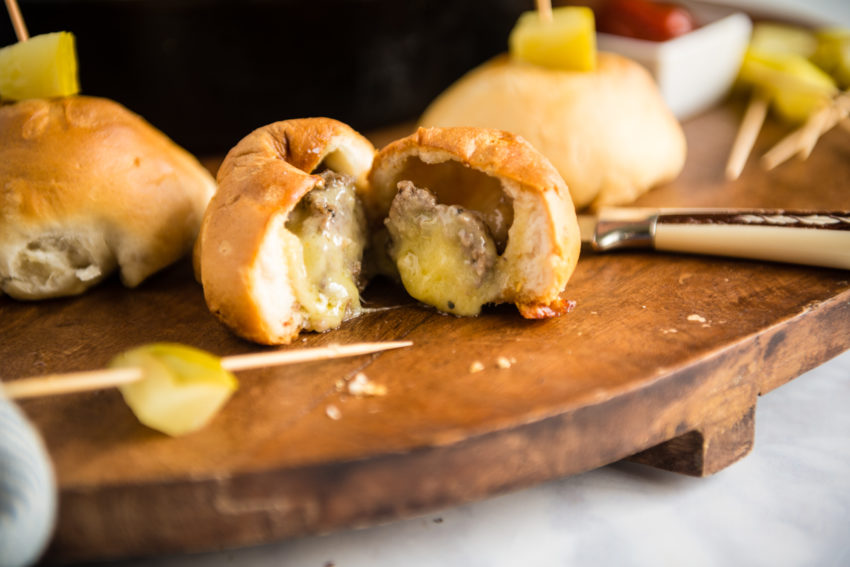
Cheeseburger bombs have all the flavors of a classic cheeseburger wrapped up in fluffy biscuit dough. We stuff juicy ground beef and sharp cheddar cheese in the middle so when you bite into it, it explodes in your mouth!
Cheeseburger Bombs Ingredients
- Refrigerated biscuit dough: Use whatever brand of biscuits you like.
- Lean ground beef: Use 90/10 or above for this recipe. We don’t want the grease to make the buns soggy.
- Worcestershire sauce: Adds a kick of umami flavor.
- Burger seasoning: Use your favorite burger seasoning.
- Salt and pepper
- Onion: Use white onion.
- Sharp cheddar cheese: Feel free to use any type of cheese you like. Pepper Jack or Monterey Jack would be great, too.
- Butter
Firstly, grease a baking dish and preheat your oven to 375 degrees. Now, on a clean work surface, use your fingertips to press each biscuit into a 3 to 4-inch circle. Spoon a bit of the chopped onion into the center of each biscuit and then arrange a slice of cheese over each.
Next, in a bowl, mix the beef with Worcestershire sauce, burger seasonings, and a dash of salt and pepper. Form the beef mixture into 10 small disks, approximately 1 1/2 inches wide and 1/2 inch thick. Place these small patties over the cheese and carefully cup each biscuit in your hand. Wrap dough over the patty. Pinch edges shut to seal.
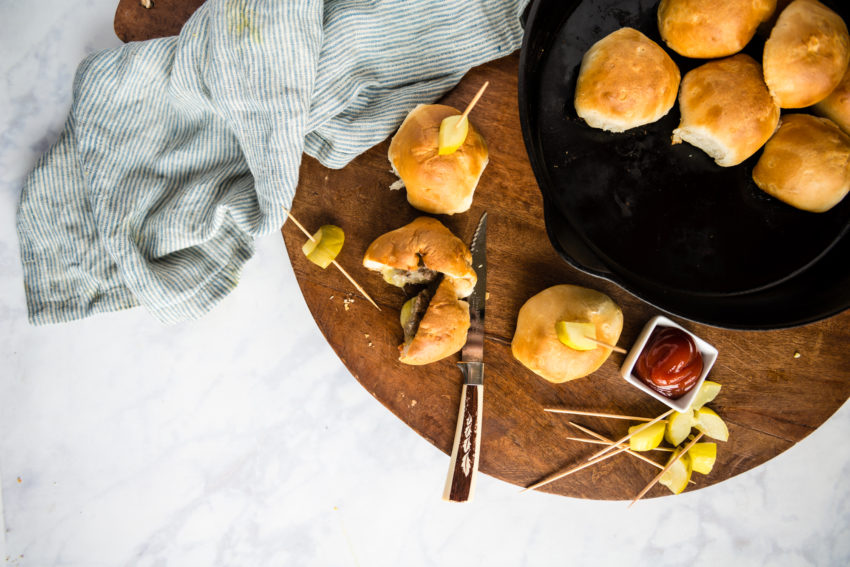
Place the sealed biscuits, seam side down, in the prepared baking dish. Nestle each biscuit in the dish with about a 1-inch gap on either side. Now, brush the tops with melted butter and bake for 15 to 17 minutes or until golden brown.
Finally, remove the dish from the oven and allow it to cool for 3 to 5 minutes before serving. Enjoy these tasty biscuit-wrapped mini burgers with pickles and dipping sauces like mustard and ketchup!
What to Serve With Cheeseburger Bombs
Serve them with little takeaway cups of dipping sauce, think ketchup or mustard, or have a build-your-own sauce bar encouraging people to mix and match their toppings. Really kick things up a notch with homemade aioli. We all love a little mayo swirled in with ketchup now and then. Or some honey sriracha sauce would be pretty kicking on the go. And, of course, you can’t have cheeseburgers without fries and Oven Fried Pickles. Serve some air fryer garlic parmesan fries for a delicious combo.
Leftovers & Reheating
Store leftover cheeseburger bombs in an airtight container in the fridge for 3-4 days. You can also freeze them for up to 3 months.
If frozen, let your cheeseburger bombs thaw in the fridge overnight before reheating.
To reheat:
- Preheat your oven to 350F.
- Pop the bombs on a baking sheet or in a baking dish.
- Bake for at least 10 minutes or until warm.
More Appetizer Recipes
If you want a quick, crowd-pleasing appetizer, look no further than cheeseburger bombs. They can be made in under 30 minutes and are perfect for game days, parties, or even as a quick dinner!
Have you tried this recipe? Do us a favor and rate the recipe card with the ⭐ ⭐ ⭐ ⭐ ⭐ and drop a comment to help out the next reader.
These cheeseburger bombs combine all the classic burger components like beef, cheese and toppings wrapped up in flaky dough for portable, handheld bites. The ultimate easy, flavor-packed cheeseburger experience!
Prevent your screen from going to sleep
-
Grease a baking dish and preheat the oven to 375.
-
On a clean work surface, press each biscuit into a 3 to 4 inch circle with your fingertips.
-
Spoon a bit of the chopped onion into the center of each disk. Arrange a slice of cheese over each.
-
Mix the beef with the Worcestershire sauce, burger seasonings and a dash of salt and pepper in a bowl.
-
Form the beef mixture into 10 small disks, about 1 1/2 “ wide and a ½” thick.
-
Place the small patties over the cheese and carefully cup each disk in your hand and work the edges over the patty, pinching shut to seal.
-
Place, seam side down in the prepared baking dish.
-
Nestle each of the biscuits in the dish with about a 1” on either side.
-
Brush the tops with melted butter.
-
Bake 15 to 17 minutes, until golden brown.
-
Remove from oven and allow to cool 3 to 5 minutes before serving with pickles and mustard and ketchup for dipping.
Serving: 1g | Calories: 107kcal | Carbohydrates: 3g | Protein: 8g | Fat: 7g | Saturated Fat: 3g | Polyunsaturated Fat: 0.4g | Monounsaturated Fat: 2g | Trans Fat: 0.2g | Cholesterol: 29mg | Sodium: 136mg | Potassium: 128mg | Fiber: 0.2g | Sugar: 1g | Vitamin A: 119IU | Vitamin C: 1mg | Calcium: 61mg | Iron: 1mg
Recipe FAQs
Yes! Just double the ingredients and make extras for a larger crowd!
Absolutely! You can make them 1-2 days ahead of time and warm them up in the oven when you’re ready to serve. You could also freeze them a few weeks beforehand and reheat them using the instructions above.
Trending Products

MASTER COOK 3 Burner BBQ Propane Ga...

SUNLIFER Charcoal Grill Offset Smok...

Realcook Charcoal BBQ Smoker Grill:...

Cocktail Smoker Kit with Torch – ...

Grilling Accessories, Grill Tools, ...

BBQ Grilling Tools Accessories Set ...

SHIZZO Grill Basket Set, Barbecue B...

Odoland 18pcs Camping Cookware Larg...

Dr. Camp 9 PCS Grilling Accessories...
